What are Lightroom Presets?
adobe Lightroom App has presets, by using these settings you can change the appearance of your videos and photos just using these presets in a few minutes, you don’t need to waste time use other settings, these presets save. your time is precious.
If you are a user of Lightroom App, you can easily import these presets and use them in simple and easy steps, today we will talk in depth about Lightroom Presets.
Installing and Importing Lightroom Presets on adobe Lightroom Classic on MAC or Windows
Adobe Lightroom Classic is designed for photographers and video editors, which is Windows or MAC (iOS) based software. Adobe Lightroom Classic can support different presets that are .XMP Files, in this article today we will talk about how to import and install presets in Adobe Lightroom Classic in Windows (PC) or MAC (iOS).
There are about 3 different ways to import and install Lightroom Presets which are discussed below
- Method 1 (Drag and Drop Method)
- Method 2 (Import Presets From “Love”)
- Method 3 (Installing and importing presets from “Import Presets” optional)
Method 1
Drag and Drop Presets
Follow up Follow the steps one by one to import presets into Lightroom Classic
- First download your favorite Lightroom Presets and save them to your MAC or PC
- Open The folder where you have stored the Presets
- Turn off the Lightroom Classic app on your PC or MAC
- Find the “import” selection and verification “import” option is enabled, select the import option and import the preset file from your Computer
OR
Drag the Preset Data directly intro Lightroom Classic App import Section by holding the mouse cursor - Lightroom Classic App Not automatically Expand the Preset file and import it into the app
- All the imported presets will be shown in the import section that you can use by clicking on them
- If you want to use and use the preset, click on special preset and the Lightroom app automatically uses this preset
Method 2
Want to importing Presets From Interest
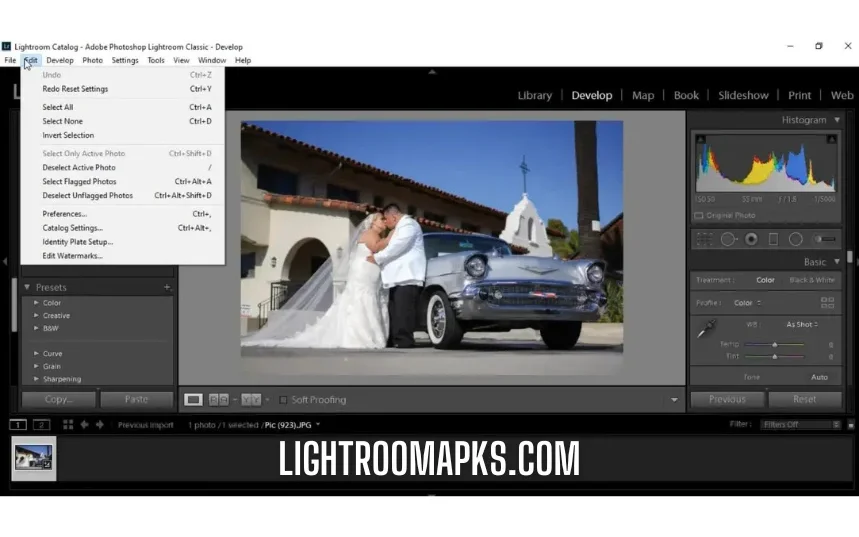
- Open the Lightroom Classic app on your computer
- Move the Mouse Cursor to the top Toolbar and click on the Edit option
- Go on “Edit”Options > Click on “Preference” button
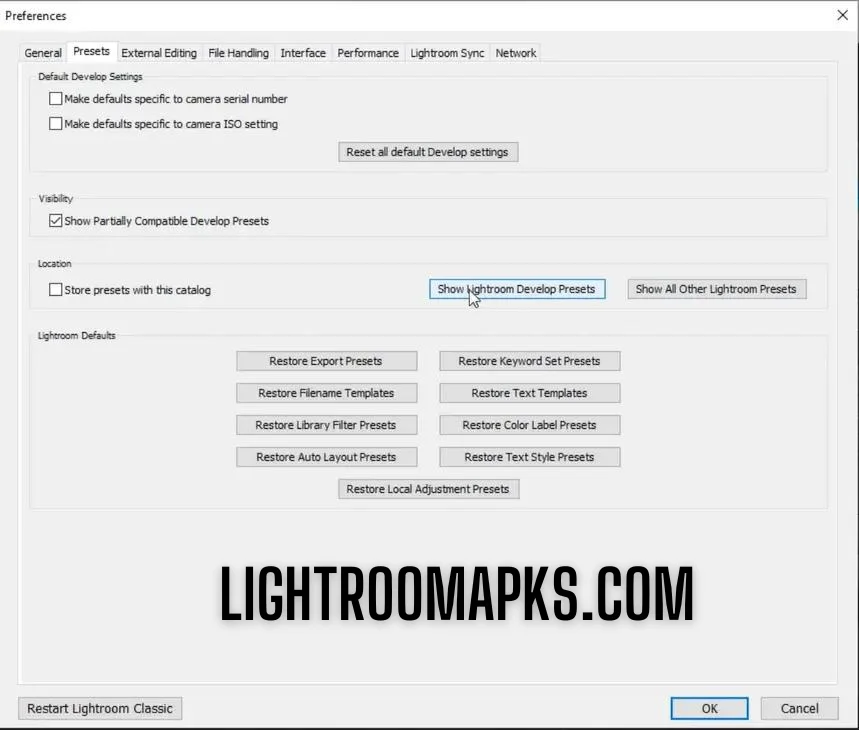
- in Preferences tab > Click on Presets > Click on Show Lightroom Develop Presets
- You can change the settings further by clicking on the different options shown
Method 3
(Installing & importing presets from “Import Presets” optional)
Proceed as follows The steps mentioned to install and import the presets from the import preset option in the Lightroom app, Most of the Presets that are available in the Lightroom app are .XMP and irtemplate.
- Go to the Top Right Menu and click on “Development” choice
- on the left side of the menu, you can see the “Presets” panel if you don’t see it, you can expand the menu bar and find the presets option
- Click on “Presets“> and choose “import”
- A box will appear, you can drag and open your favorite preset by clicking on it
- The Lightroom app allows its users to separate presets by creating folders (optional)
- All the presets will appear inside “presets” Chapter
- Now you can use presets that you want to apply to your photos and videos by clicking on the presets.
Importing lightroom App Presets in mobile
Now you can use Lightroom presets on your smartphone or iOS mobile easily by following 3 easy & simple ways
Method 1
(Synchronization with Desktop app)
When you download the presets in your Lightroom Classis desktop app, that gets released in Adobe Creative Cloudby accessing the adobe creative cloud on your phone, you will be able to enjoy it on your mobile app which is also known as the synchronization of files, you do not need to upload your favorite presets on mobile, just upload them in adobe. creative cloud and enjoy it on Mobile and PC just by accessing your adobe creative cloud app.
Method 2
import presets using the app
just follow these simple steps to import presets
- Download it Lightroom App and Open it on your Android or iOS Mobile
- Click to open “new project” and upload your desired photo or video that you want to use the presets
- At the bottom of your cell phone screen you will see “Preset icon”
- At the top right of the App there are 3 Dots> click here 3 Dots > Select Import Presets
- Wait for a few minutes to open a new window
- A new pop-up window will appear> walking go to the presets folder and choose your favorite preset that you want to apply to your photos and videos
- imported presets will appear in the presets section, which is ready to use
- click rpreset and use it, the Lightroom app will start working on it and wait a few seconds to successfully apply the preset
- Later Use Presets You can make further changes through the Lightroom editing tool.
Method 3
import presets to use “DNG” Information
Follow these simple and easy steps and import presets using DNG files
- Download Lightroom Presets in “DNG” Format
(This DNG file will have the Presets file in it) - Click on “+” Click or import
(Options available will depend on the version of Lightroom app you are currently using on your mobile device) - select DNG format presets from your folder on the mobile phone
(you can select multiple files at a time just hold and click on the preset files one by one) - You can save this preset for later use by simply clicking on the save preset option at the top 3 dots
- click on the preset and wait a few seconds to use it on your photo or video, you can make more changes in it when the preset application process is complete.
- you can save the preset as well as export the image or video when it is done.
Pros and Cons
of Lightroom App Presets
End
By reading and using carefully All the methods mentioned above, you can now export and use Lightroom presets on mobile and PC, by using the presets as Now you can save your valuable time by using the presets once. and edit your photos and finally you can export them and save photos with presets for later use.
Bonus Tip: Watch the video and follow the steps one by one, if you find any problems let me know in the comment section, and I will try my best to answer your questions as soon as possible yes, Thank you.
FAQ’S
What is the difference between Lightroom Classic and Lightroom CC when it comes to importing photos?
Lightroom Classic and Lightroom CC have slight differences in the import process.
In Lightroom Classic, we use the “Import” dialog to import images from your computer or pc, camera, or other drives
In Lightroom CC, The import process is easy & integration with Adobe Creative Cloud storage, making it easy to import and use photos and videos across devices.
Does Lightroom automatically import photos from my camera or smartphone?
Yes, Lightroom has an automatic import feature for photos when it is connected to a PC, you can do the automatic import settings in the settings in the Lightroom app
Can I cancel an import if I have imported the wrong image?
“YES” You can undo an import if I have imported the wrong image, open the image simply and click on the 3 Dots that are preset to the top Right Corners and click on the Delete button.
Can I use Lightroom mobile presets on desktop?
yes, you can use it on desktop by downloading and installing the app properly.
Is Lightroom better on mobile or desktop?
Lightroom for mobile & desktop is the same product, which is designed for different settings according to the user’s preferences.
Are mobile presets worth it?
> Download From Source Link <
Download Link